14,378 total views, 3 views today
This is going to be a simple tutorial to setup a 3D uniform particle grid using a for-loop in a script. While it’s nothing fancy, it’ll serve as a base with which we can better test out GPU particle displacement in the later tutorials.
[IMAGE REMOVED]
Once the grid is setup, we can do anything else we want, like the deformation above (also part of the tutorial).
Part 1 – Particle System Setup
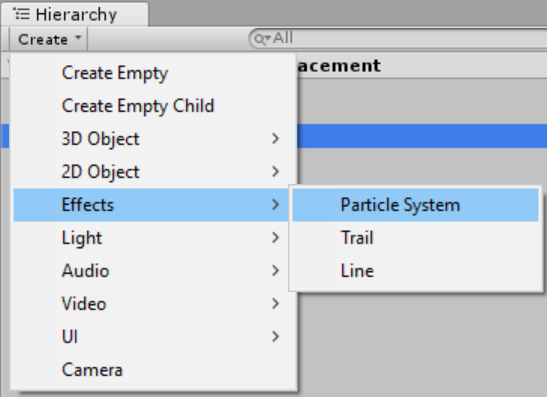
First, let’s setup the particle system. Drop a new particle system object into your scene.
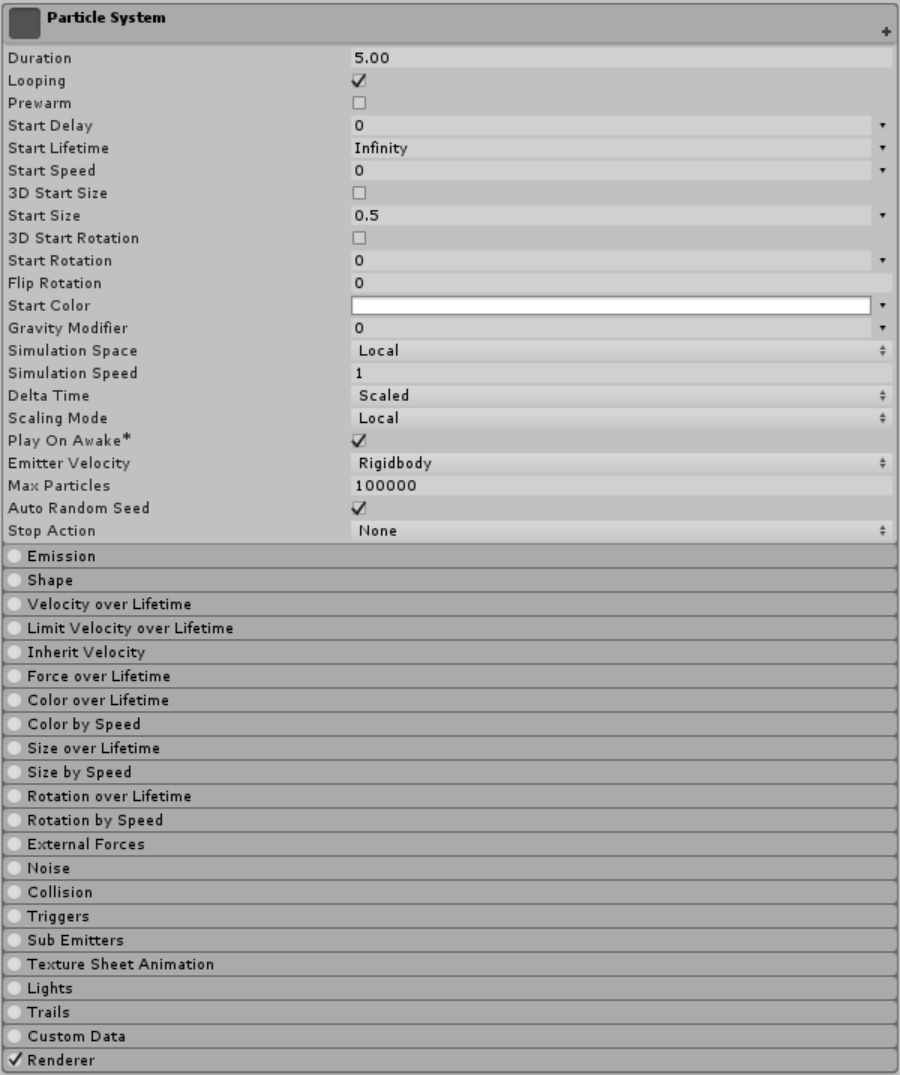
Change the Start Lifetime to Infinity. We don’t want any particles to die. Change the Start Size to 0.5, and the Max Particles to 100,000. Disable all modules except Renderer. We don’t want the system controlling emission since we’ll do this ourselves from the script.
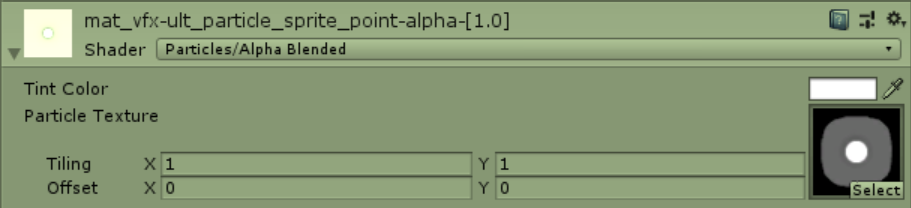
For the Renderer material you can use anything you want, but I’ve chosen the alpha blended point sprite material from Ultimate VFX since it gets the job done of simply showing a particle. You could just as well use the default particle material/texture.

Part 2 – Emitting a Uniform Grid
Now that we have our particle system setup, we can work on our script to emit particles in the grid form with some customizable properties for dimension, size and density.
Create a new script and name it ParticleGrid. Remove all methods so we have a blank slate to work with.
using System.Collections;
using System.Collections.Generic;
using UnityEngine;

public class ParticleGrid : MonoBehaviour
{

}
We’ll be attaching this script to the same object as the particle system, so add a ParticleSystem variable. This way, we can keep a reference to the system with a GetComponent call to self. We’ll also need a variable for the bounds of the grid, as well as the density, which we’ll define as resolution for the number of particles on that axis. The total number of particles will therefore be resolution X * Y * Z, fit into a 3D space defined by the bounds. I’ve given these two variables some default values to work with.
public class ParticleGrid : MonoBehaviour
{
    ParticleSystem particleSystem;

    public Vector3 bounds = new Vector3(25.0f, 25.0f, 25.0f);
    public Vector3Int resolution = new Vector3Int(10, 10, 10);
}
Copy and paste the code below. We’re doing everything in side the OnEnable call, so that if we deactive/active our game object (which will stop and clear a particle system automatically), we can reinitialize the grid emission.
We’re simply grabbing and storing the particle system on the current object and then emitting particles manually for each axis as we iterate over the loop while keeping true to the bounds and resolution. I’m subtracting by half the bounds for each axis so that the game object transform will be at the center of the grid with equal negative and positive extents relative to the position.
void OnEnable()
{
        particleSystem = GetComponent<ParticleSystem>();

        Vector3 scale;
        Vector3 boundsHalf = bounds / 2.0f;

        scale.x = bounds.x / resolution.x;
        scale.y = bounds.y / resolution.y;
        scale.z = bounds.z / resolution.z;

        ParticleSystem.EmitParams ep = new ParticleSystem.EmitParams();

        for (int i = 0; i < resolution.x; i++)
        {
            for (int j = 0; j < resolution.y; j++)
            {
                for (int k = 0; k < resolution.z; k++)
                {
                    Vector3 position;

                    position.x = (i * scale.x) - boundsHalf.x;
                    position.y = (j * scale.y) - boundsHalf.y;
                    position.z = (k * scale.z) - boundsHalf.z;

                    ep.position = position;
                    particleSystem.Emit(ep, 1);
                }
            }
        }
}
The final copy-paste script looks like this.
using System.Collections;
using System.Collections.Generic;
using UnityEngine;

public class ParticleGrid : MonoBehaviour
{
    ParticleSystem particleSystem;

    public Vector3 bounds = new Vector3(25.0f, 25.0f, 25.0f);
    public Vector3Int resolution = new Vector3Int(10, 10, 10);

    void OnEnable()
    {
        particleSystem = GetComponent<ParticleSystem>();

        Vector3 scale;
        Vector3 boundsHalf = bounds / 2.0f;

        scale.x = bounds.x / resolution.x;
        scale.y = bounds.y / resolution.y;
        scale.z = bounds.z / resolution.z;

        ParticleSystem.EmitParams ep = new ParticleSystem.EmitParams();

        for (int i = 0; i < resolution.x; i++)
        {
            for (int j = 0; j < resolution.y; j++)
            {
                for (int k = 0; k < resolution.z; k++)
                {
                    Vector3 position;

                    position.x = (i * scale.x) - boundsHalf.x;
                    position.y = (j * scale.y) - boundsHalf.y;
                    position.z = (k * scale.z) - boundsHalf.z;

                    ep.position = position;
                    particleSystem.Emit(ep, 1);
                }
            }
        }
    }
}
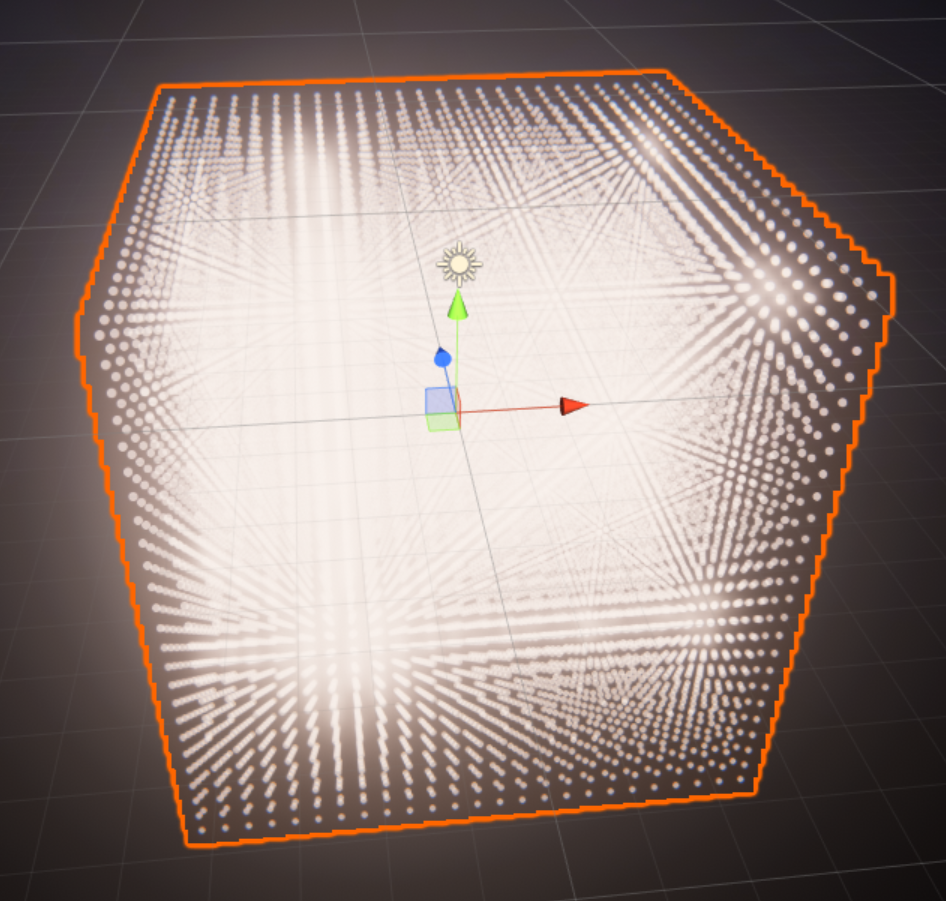
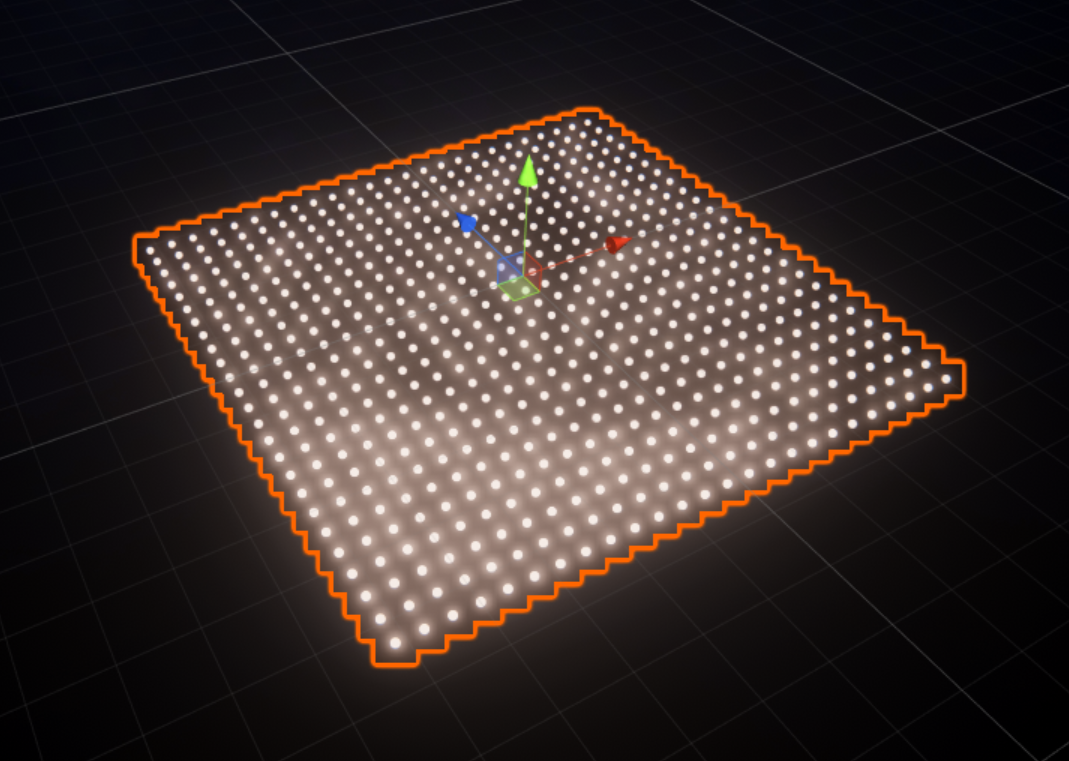
You can go ahead and attach this script to the particle system game object if you haven’t done so, and when you press play you should see something like this.
If, for example, you wanted a 2D grid, you could set the Y axis of the resolution and bounds to 1.
Part 3 – Deformation
We’re already done, but since the preview showed a deforming uniform grid, I figured I’d add this part in for those of you interested.
I’ve reverted the Start Lifetime to 15 and set the Simulation Speed to 2 (just so we run faster through the deformation without too many changes).

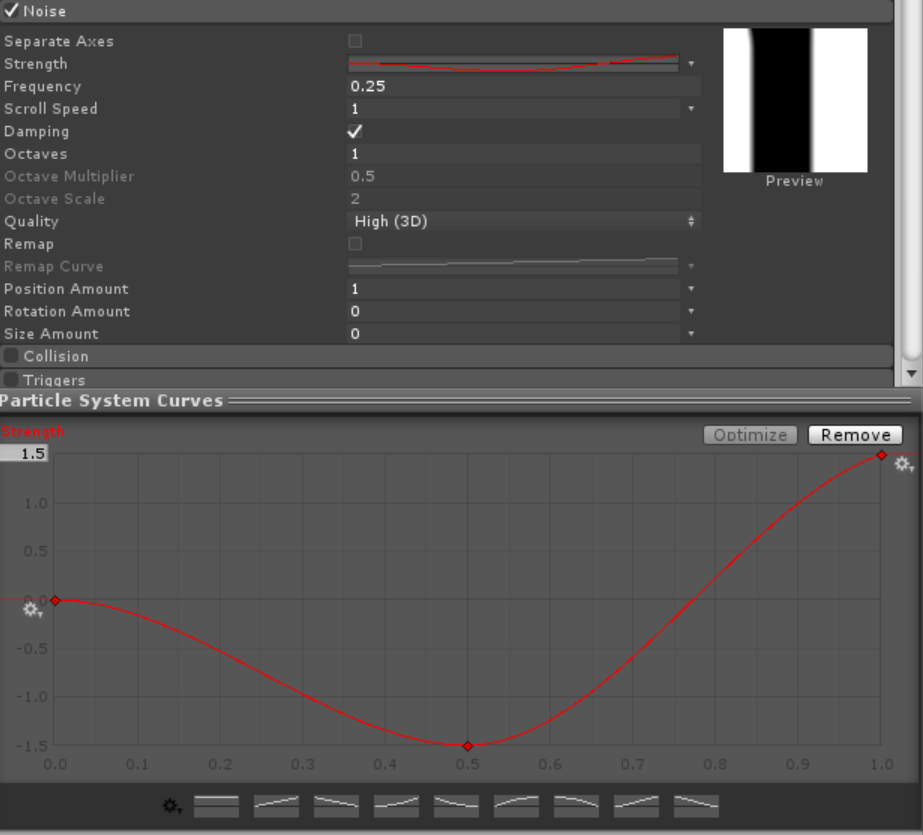
Enable the Noise module and copy these values. The strength is scaled to 1.5 with an immediate dip to -1.5 at the center before ramping up to 1.5 at the end. I’m essentially causing the noise to be applied inverted and then smoothed into the positive range so that it creates an almost “reversal”-like effect – similar to the one in the preview. I’ve set the Frequency to 0.25 and Scroll Speed to 1.
That’s it! Easy, right? You can enable and mess around with the Colour over Lifetime and Size over Lifeftime modules, too. If this was a bit too plain for you, don’t worry! Once we get to GPU particle displacement we can have even more fun. In the meantime, I’m sure you can think of other creative uses for uniform particle grids. You could even modify the script to emit the particles perfectly over the vertices of a mesh.
[IMAGE REMOVED]
would love to be able to run this on a later version of unity.