18,902 total views, 2 views today
This is an effect that fades away opaque/solid objects using a stipple (or dithered) pattern where a pixel is either entirely invisible or fully opaque in place of (either as stylistic choice, or technical constraint) true alpha-blended pixels. You may have seen this effect in Super Mario Odyssey.
It’s a custom shader that needs to be applied to every object we want to fade in this way. I’m using Amplify Shader Editor (ASE), which has built-in nodes to basically do everything you need to make this effect… in fact, I probably shouldn’t have bothered making a written tutorial. It’s really easy, so you can just skip to the end to see the node graph if you know what you’re doing.
[IMAGE REMOVED]
I’m also using Unity’s own (free) office pack for the environment which I’ve modified slightly. You can grab that and ASE using the affiliate links below.
Part 1 – The Whole Thing
Have ASE imported. Right-click and Create -> Amplify Shader -> Surface. Name it “Standard Dither”. I’ve called it that because it’s a variation of Unity’s Standard PBR Shader.
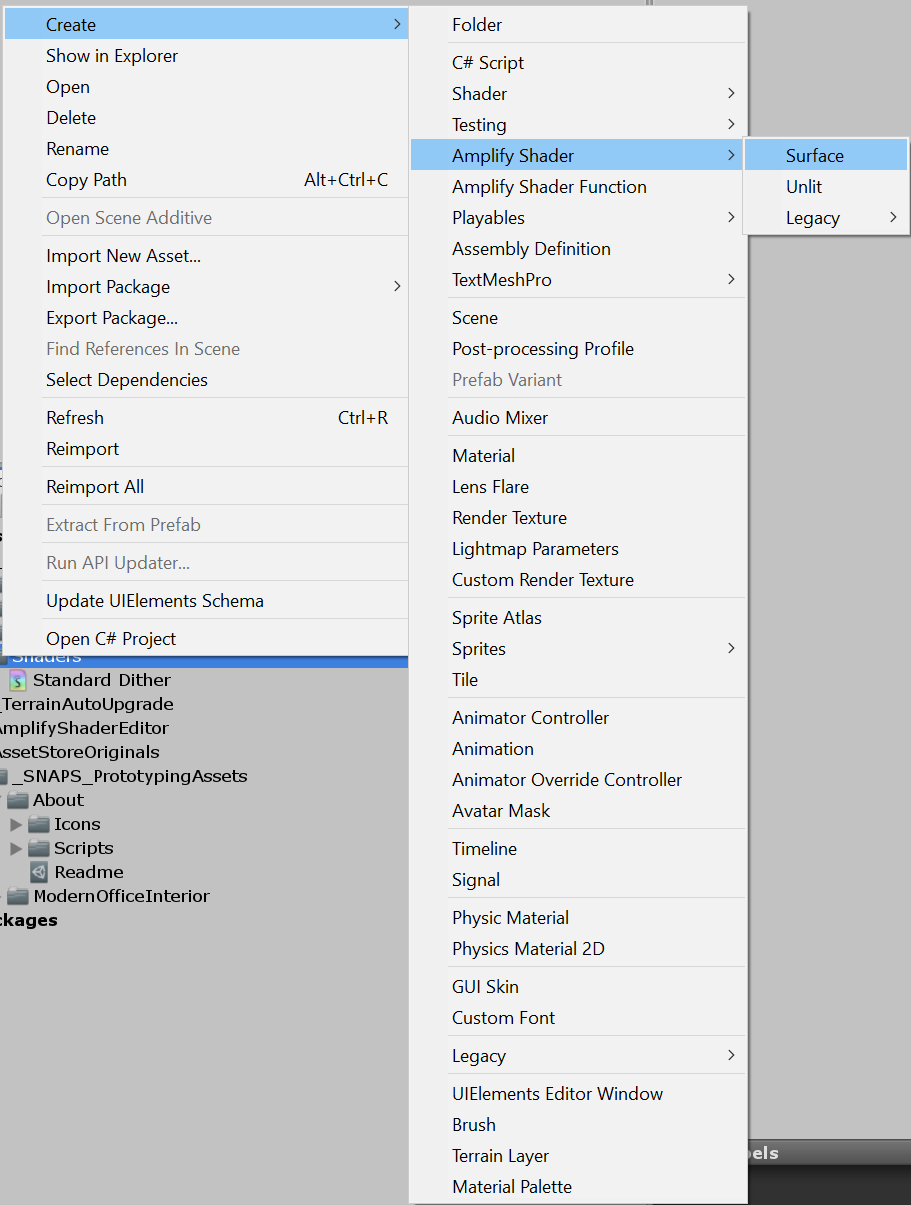
Name it whatever you want. I’ve called it “Standard Dither (Tutorial)” and have it organized into a “folder” under my name (this is how it will appear when selecting the shader for a material).

At this point the shader output will not allow you to connect to “Opacity Mask”, which is what we’ll need for this effect.
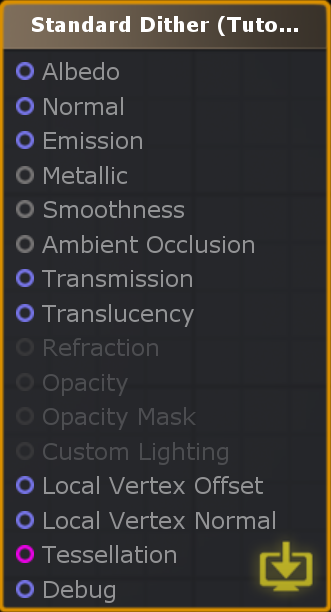
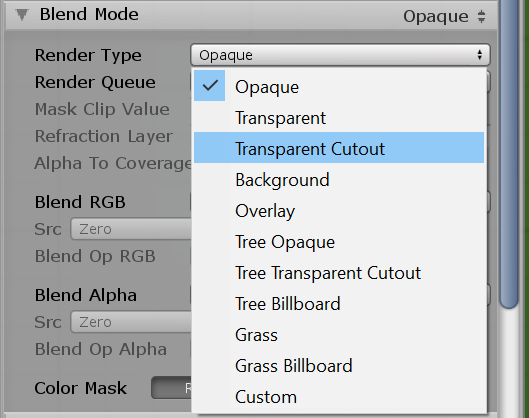
To fix this, change the Render Type under the Blend Mode foldout to “Transparent Cutout”.
Yay.

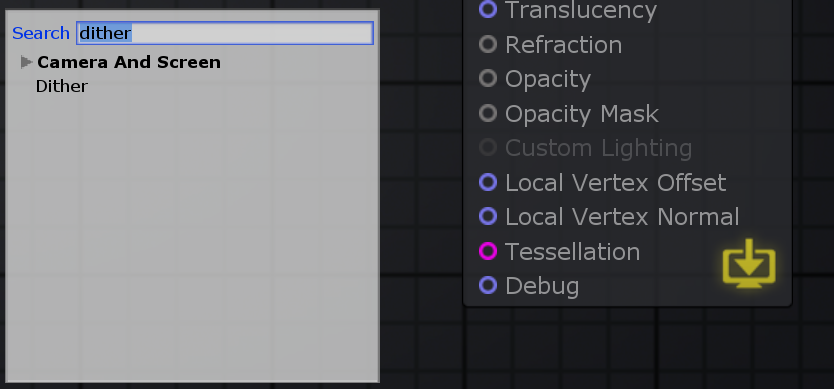
Here’s the “hardest” part. Where we actually make the effect work. Right-click to add a node, search for “dither”, and then add that node…
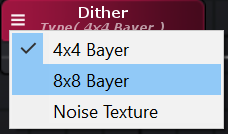
Change the matrix from 4×4 (16 dither layers) to 8×8 (64 dither layers). This decreases the banding that’s visible across the falloff. Purely optional, of course.
Now add the Camera Depth Fade node and connect the output to the dither node’s input. This returns a gradient in the [0.0, 1.0] range as defined by the two inputs. Set the Length (aka Falloff) and the Offset (aka Start Distance) to whatever you want. I have the value 2 for both.
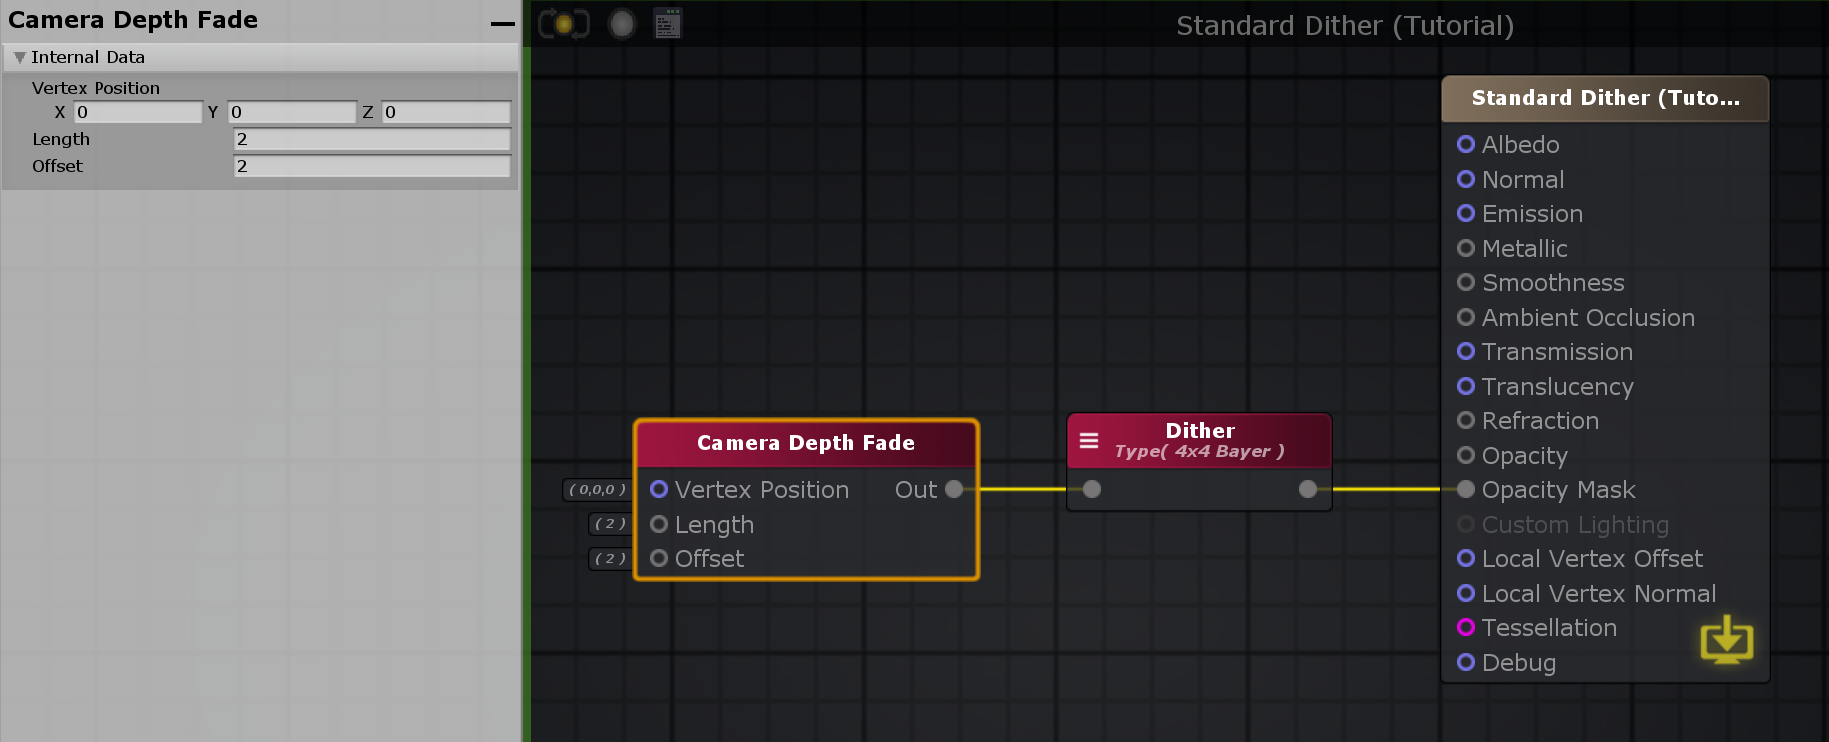
You’re done. You can now add some extra nodes for a tinted texture and controlling the Metallic and Smoothness properties. I’ve also added properties to easily control the dither falloff and distance.
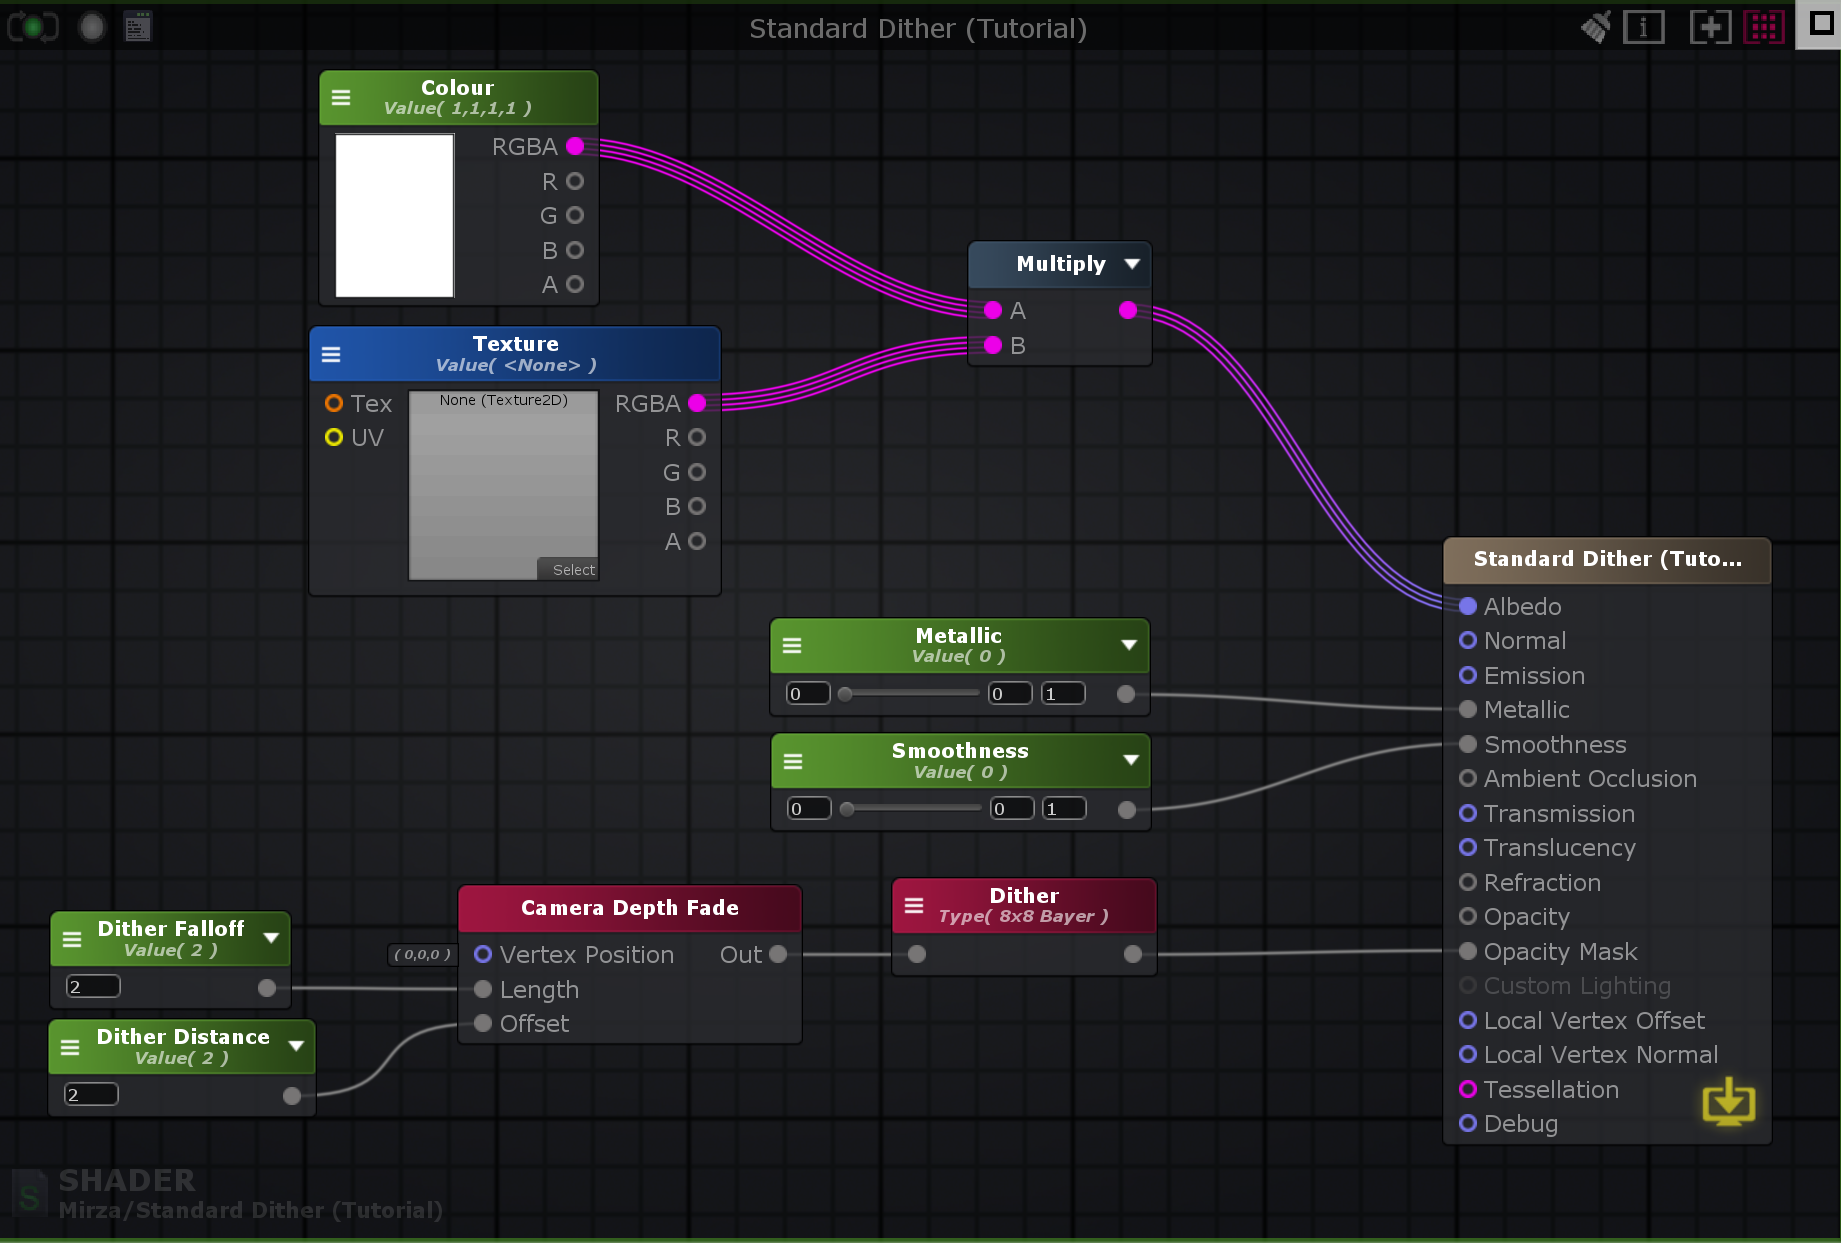
If you get any errors on the shader about too many texture interpolators, increase the required Shader Model from 3.0 to 4.0.
Here’s what that looks like in the scene where the props are using 2.0 for the falloff and distance, and the purple-ish cube is using 0.5 and 1.0 respectively.
[IMAGE REMOVED]